Starting with a good clean and clear shop you need to lay out everything you might need to disassemble the rear of the machine. The left rear outer CV joint is where we found the problems and to get the disassembly started we first needed to jack the vehicle up and get some jack stands under the rear frame to secure the heavy ride. Using jack stands instead of just a jack will make sure that the SXS doesn’t collapse and leave stains resembling body parts on the floor of the shop.
 |
|
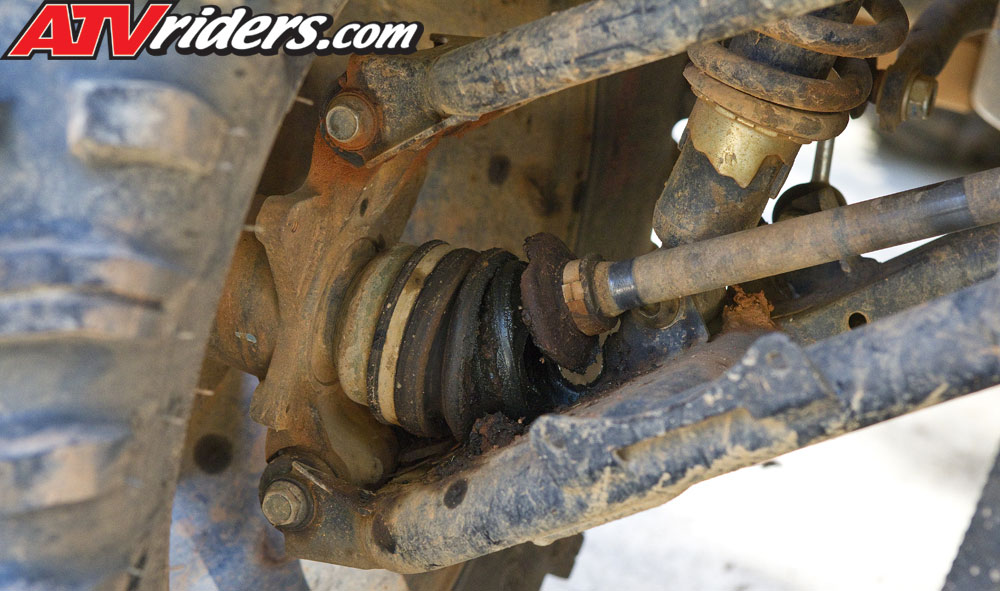
Our Yamaha Rhino UTV / SxS axle had seen its better days as a rogue branch busted the boot & mud took it out of commission
|
After removing the rear wheel, we needed to remove the stake nut that holds the rear axle in the hub itself. Next would be the two bolts that hold the wheel hub in the upper and lower A-arms. Loosen the A-arm mounting bolts that attach the arms to the frame, lift them up as high as possible and retighten a little to help hold them out of your workspace.
Hint: If you have a tight work area just push the wheel underneath the machine close to the area that you’re working on and this could be a little more security for yourself in case some monkey tries to shake the jacks loose. This way the SxS or ATV cannot fall all the way to the floor.
To remove the axle from the differential housing simply straighten the axle perpendicular to the machine and give it a swift jerk outward. The axle should come right out. Some retaining clips will make certain axles a little more difficult to remove but just keep tugging as they are designed to be removable. When the axle is out you may want to closely inspect the seal in the differential for possible replacement while you have the rear end apart. Stuffing a few paper towels in the axle hole will keep differential fluid from draining out onto the shop floor.
 |
|
This is what it will look like after the parts are together & ready for the bearings
|
 |
|
Be sure to install the bearings across from each other one at a time
|
To install the ball bearings simply rotate the spider inside the cage until you can get one ball in at a time. It is easiest to place the ball bearings across from each other to keep the tension on the cage even. With every bearing that is installed the tighter they get and a little harder to install each one.
 |
|
Once the bearings are all in you are ready for grease
|
The cage will now be tight in the cup and from here its time to put some Lucas oil Moly-based CV grease to work. I use a small hand held grease gun but a standard grease gun is sufficient. The grease can be seen squeezing out from around the bearings and now we are ready for reassembly of the joint and axle. Be sure to put the new boot onto the axle before installing the axle into the CV.
 |
||||
|
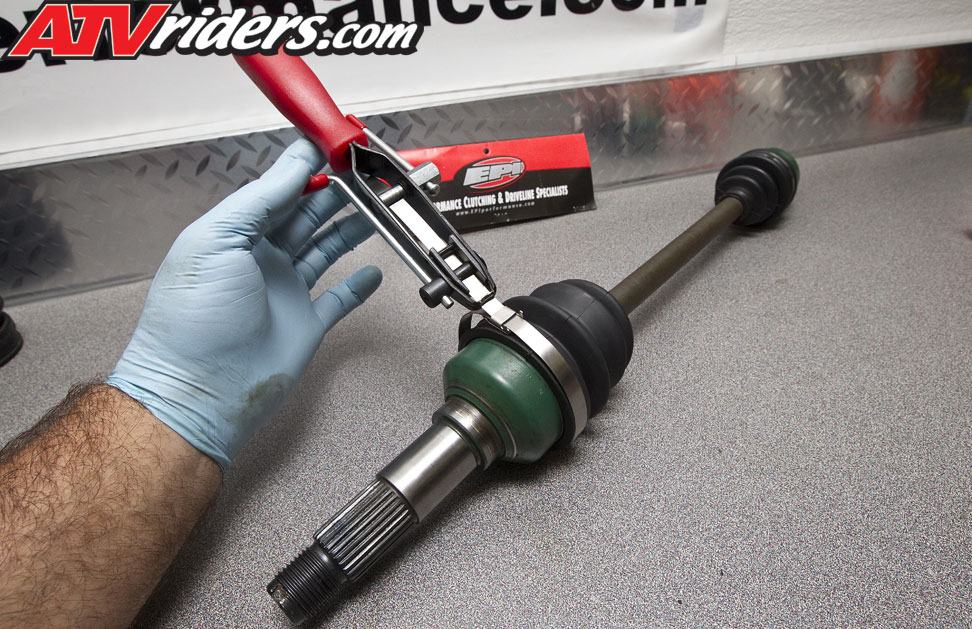
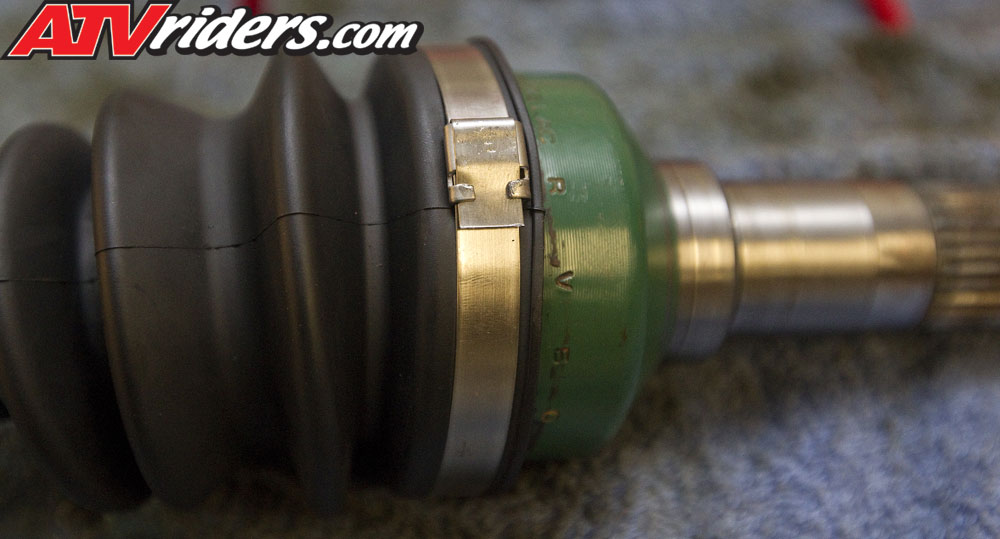
A small hand held grease gun works great for greasing the new CV joint bearingsOnce the axle is installed into the CV cup the final step is to install the CV boot and clamp it into place. The boot will fit over the CV cup and the lip on the CV cup should hold the boot in place until you can get the clamp in place and tightened. The stock Yamaha Rhino axle has a recessed spot on the axle itself that the small end of the boot will fit into. The boot is ready to be clamped and reinstalled into the rear end. Using a standard banding tool from EPI we installed the band clamps to firmly hold the boot but not to tight that it could cut into the boot material.
The final step is to reinstall the axle in the rear end and begin to reassemble the rear suspension. Be sure to grease the pivot points on the hub and do not reuse the stake nut. A new stake nut is only $10 or less and it’s a small price to pay to keep the wheel on the axle!
This technical article is meant to be a guide for light to experienced mechanics who like to work on their own ATV’s or SxS’s. This procedure involves risk that if not completed correctly can cause personal injury For ATV/UTV maintenance parts and more, shop with our sponsor partspitstop.com |