

Step-by-step approach to a clean machine will improve performance
Your snowmobile clutches are an important link for transferring the engine’s power to the snow. Maintenance and modifications are endless, so where does one start with such an important link?
The factories produce the stock clutching or calibration with a broad range of use in mind. In most cases this range fills the needs of the average rider.
Far too often snowmobile clutches are forgotten, but when it’s time to do clutch work many people want to upgrade to new or high-performance parts. This is not always the answer; a general cleaning is the key to top performance, not necessarily adding performance parts.
The next time you are at the races take a close look at the mechanics in the pits. They will be taking the belt off and checking the clutches between races. Top mechanics know that peak performance often is found in the clutches.
Keep it clean
Most clutches aren’t properly maintained, they’re simply out of sight and out of mind.
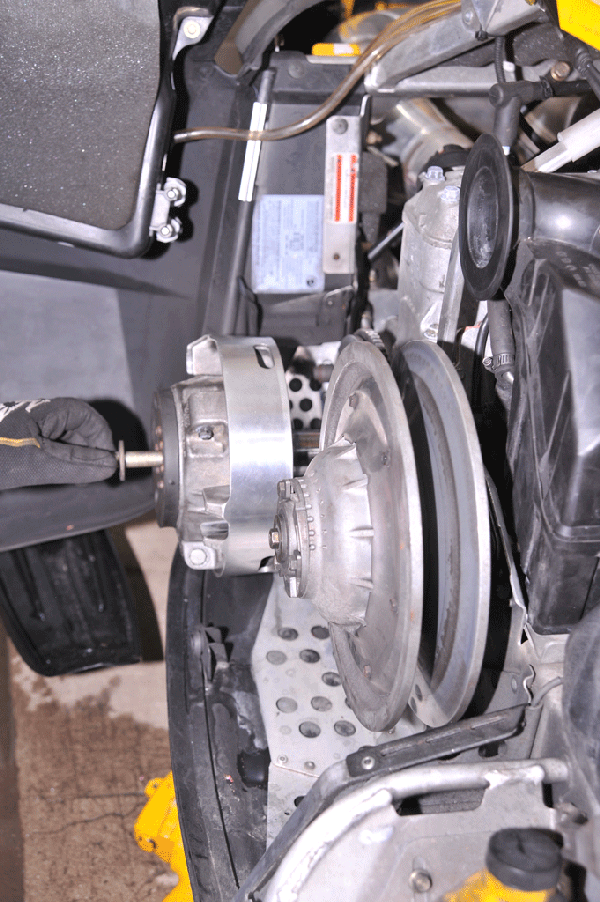
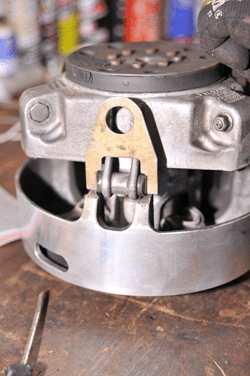
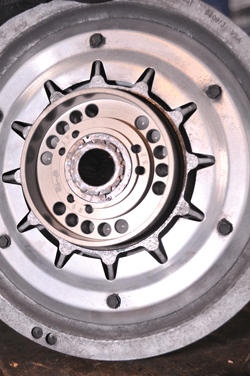
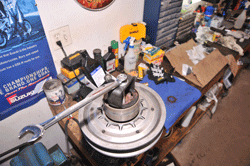
Keeping these units clean is important; belt dust builds up under normal use. Cleaning this dust quickly can be done with compressed air, but disassembly of the components is always the best choice. Following this step-by-step procedure will help you to clean and maintain the current most widely used Ski-Doo stock clutch. We’ll start with the TRA primary clutch, often called the drive clutch.
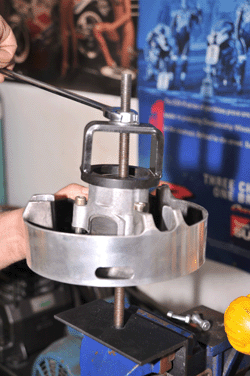
Removing this unit from the sled, you will need the proper puller. First remove the clutch bolt; this can be removed with an impact gun or a socket if you have a tool to prevent the clutch from turning.
Once the bolt is removed, install the proper puller and tighten it up against the crankshaft end. The clutch assembly will pop off. If it is stubborn, a tap from a hammer on the end of the puller will make it pop off. The hammer tap offers a vibration that often works wonders for stubborn removals.
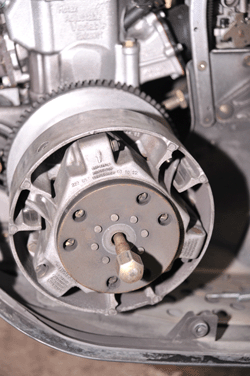
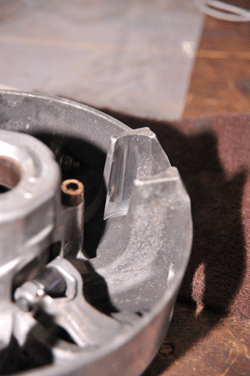
Once the clutch is off (it’s easier to work on it at the bench), the next step is to separate the two halves, using the puller that was used to remove the assembly. Use the same puller as seen here.
Tap the end of the puller to separate these two halves but be careful not to let the inner half fall, notice we are doing this over a bench so that the inner half has somewhere soft to land.
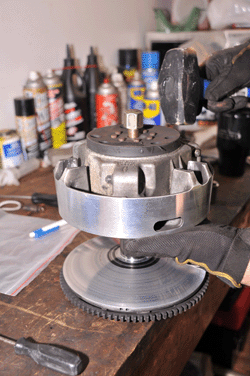
Next work on the sliding half, this piece is known to get dirty, and so a good cleaning will be required. To work on this piece requires three forks that can hold the buttons in place. The forks can be seen here (Photo 4). These forks hold the button assemblies together and make it possible to slide the unit together again. However, it also makes for a tidy unit to work on during this inspection and cleaning stage. After a good blow with compressed air, you can see the inner workings of the TRA clutch.
One of the first things we did was use a Scotchbrite pad to polish the slide areas where the buttons travel in and out. This was a trick we learned in a factory race trailer a few years ago. The race mechanics do this, so that there is no possibility of the clutch sticking.
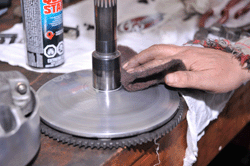
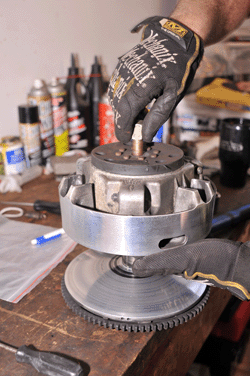
The clutch faces also are polished with a Scotchbrite pad. By using straight line strokes, one can deglaze these surfaces quickly. Remember to do both sides of the clutch so the belt can be grabbed with clean surfaces.
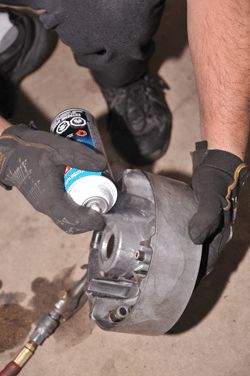
Using aerosol brake cleaner is a great cleaning agent for this job. It will break loose the toughest grime and belt dust residue. Another cleaning agent often used by race mechanics is acetone. This is a standard service, but we took another couple of steps, by taking the drive spring out for inspection and cleaning.
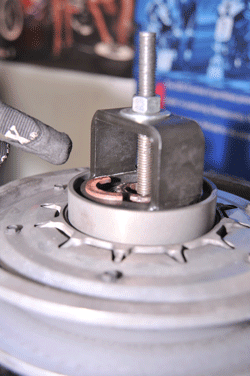
By holding the spring housing in place, it is easy to remove the three Allen head bolts that hold the spring and housing in place. Note, one must remove these bolts evenly, all three at the same time to prevent the spring and housing from binding.
We also found the clutch roller pins were seized, so we took these assemblies apart by removing the small cotter pins and cleaned every piece after it was apart. After cleaning we found the pins rolled perfectly, with no effort at all. These pins ride the ramps and these need to roll freely. You can buy these cotter pins separately from a BRP dealer and they also carry clutch repair kits that have cotter pins included.
Installing new cotter pins is a good idea, never reuse cotter pins; always replace them. Tap them with a hammer to get them to form the proper shape.
When putting the TRA primary clutch back together, the following is IMPORTANT!
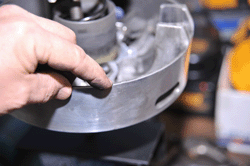
Check, we repeat, check the alignment marks. There are alignment marks on every piece, if you miss the alignment marks it will cause vibration and balancing issues. Trying to locate the alignment nub in the sliding half is the most difficult, look at the photo and notice the raised nub on the leading edge, just in front of the mechanic’s fingernail. Make sure this nub and the arrows on all other clutch parts are lined up.
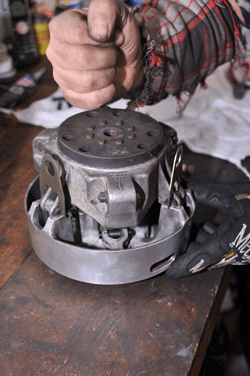
The sliding half assembly is a simple procedure, with the three retaining forks holding the buttons in place, just tap the sliding half with your fist, once. The forks will fall and the sliding half assembly is ready to mount to the fixed half. The TRA clutch is ready to install.
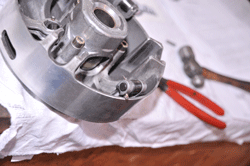
Servicing the secondary clutch
This service is similar to what we have already covered on the primary clutch. Cleaning and inspection are the same, using the same cleaning materials. Removing the secondary, or driven clutch, is easily done by removing one 13mm bolt. This bolt is located in the center, on the end of the jackshaft. Working on the bench, first, take note of the spring’s location. There are several holes for different spring adjustments and it’s a good idea to mark the hole that is currently being used. You already know that this position works.
Taking the secondary apart, you’ll need the same spring compressing tool we used for the primary spring. Compress the secondary spring until the helix moves down, low enough to remove the two crescent shaped retaining clips.
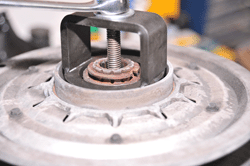
Now back off the spring pressure so that you can remove the helix and the spring.
This is the time for cleaning and a visual inspection for worn or damaged parts. Check for wear on bushings and plastic buttons / slides and replace the worn parts. Remember that clutch parts are to be kept DRY as NOT even a light spray of WD40 is necessary. This lube will attract dirt.
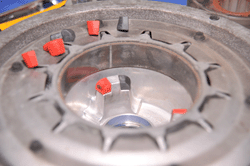
We thought we might have to replace the secondary buttons, shown here, loose on top. There was a little wear in the originals, but we decided to leave them in place and keep the replacement ones we bought as spares. Red is for reverse and black is for forward. These buttons can be bought separately at your BRP dealer.
Another important check to make is to look over the large bushing; this bushing can be seen in between the new and old buttons. Fit the helix into the secondary and check for smooth operation, no side-to-side play. If there is too much side play the helix will bind and stick causing poor performance and further damaging the clutch components.
The secondary assembly is easy to work on, but make sure you align the spring in the same holes you marked earlier. This will take a lot of guesswork out later, or prevent a potential clutch problem.
With everything in place wind the tool down, compressing the spring in order to place the two retaining clips into their fixed location.
The secondary is done and now can be installed on the snowmobile.
Enjoy the smooth ride and check your clutches, keep them clean and dry!
Credit: American Snowmobiler amsnow.com
For more information about customizing your bikes, motorcycles, tons of the best OEM brands, personal watercrafts, atvs, parts, accessories, or maintenance tips please see our sponsor at: PartsPitStop.com .
#partspitstop # #snowmobile #seasonalprep #DIY #outdoorlife #rideeverywhere #oemparts #aftermarketparts #oemaccessories #aftermarketaccessories
